What is Abstract Factory Design Pattern
The Abstract Factory Design Pattern is a creational design pattern that allows you to create families of related objects without specifying their concrete classes. It provides an interface for creating families of related or dependent objects, without specifying their concrete classes. This pattern provides a way to encapsulate a group of individual factories that have a common theme.
The pattern works by defining an abstract factory interface that specifies a set of methods for creating abstract product objects. Concrete factory classes then implement these methods to create specific product objects. This approach enables you to create families of related objects that are designed to work together, making your code more flexible and easier to maintain.
Modeling Design Pattern with Class Diagram
- Create a new project Design Patterns.
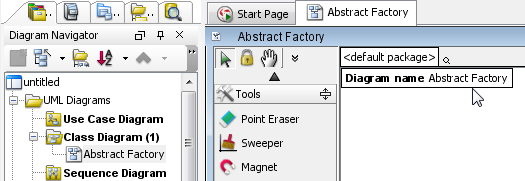
- Create a class diagram Abstract Factory.
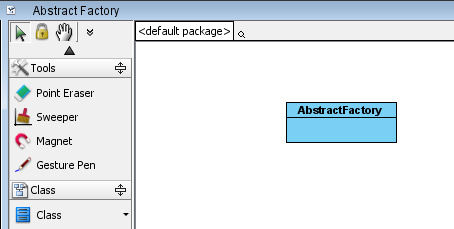
- Select Class from diagram toolbar. Click on the diagram to create a class. Name it as AbstractFactory.
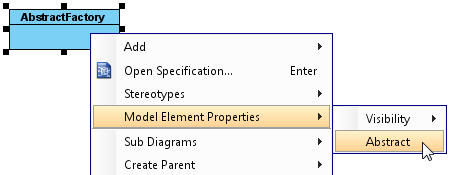
- Select the AbstractFactory abstract by rioght clicking on AbstractFactory and select Model Element Properties > Abstract from the popup menu.
- Create the abstract product classes AbstractProductA and AbstractProductB. Set them as abstract. Up to now, the diagram should look like this:
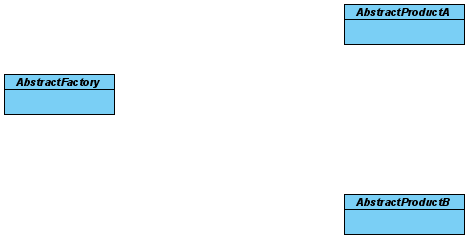
- Right-click on AbstractFactory and select Add > Operation from the popup menu.

- Name it as CreateProductA(), and make AbstractProductA as return type.

- Add also operation CreateProductB(), and make AbstractProductB as return type.

- Set both operations as abstract by right clicking on the operation and selecting Model Element Properties > Abstract from the popup menu.
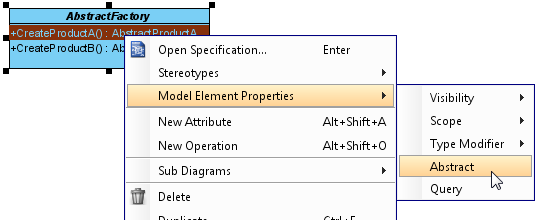
- Move the cursor over AbstractProductA, make use of resource icon Generalization -> Class to create two subclasses Product A1 and Product A2.
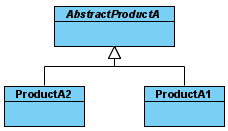
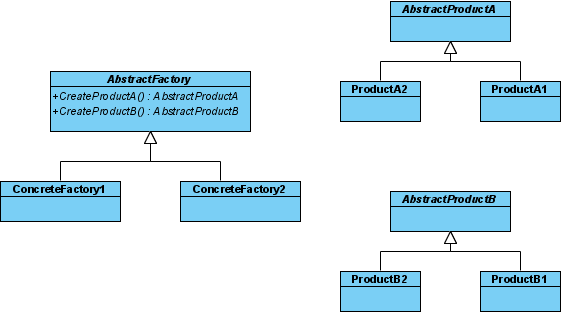
- Similarly, create subclasses ProductB1 and ProductB2 from AbstractProductB. Up to now, the diagram should look like this:
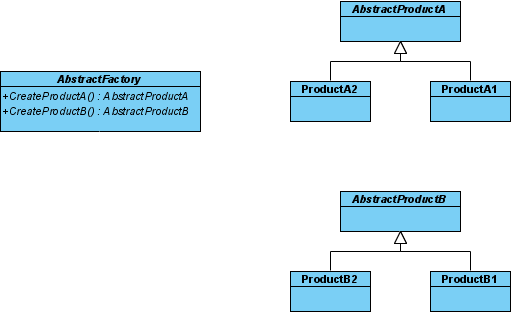
- Create subclasses ConcreteFactory1 and ConcreteFactory2 from AbstractFactory.
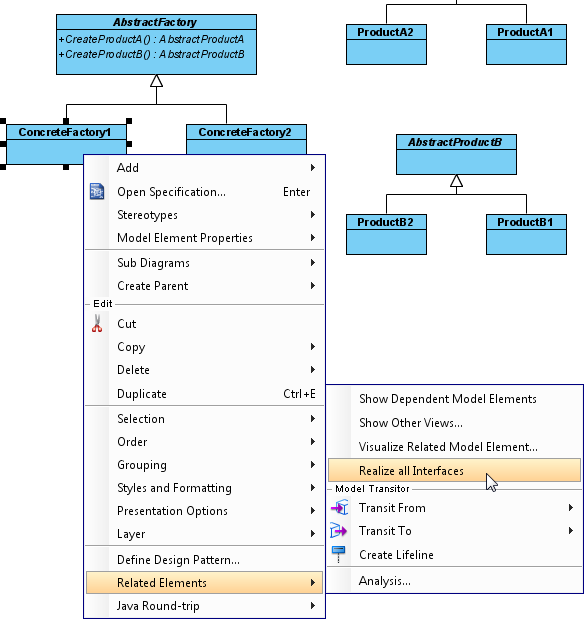
- Inherit operations from AbstractFactory by right clicking on ConcreteFactory1 and selecting Related Elements > Realize all Interfaces from the popup menu.
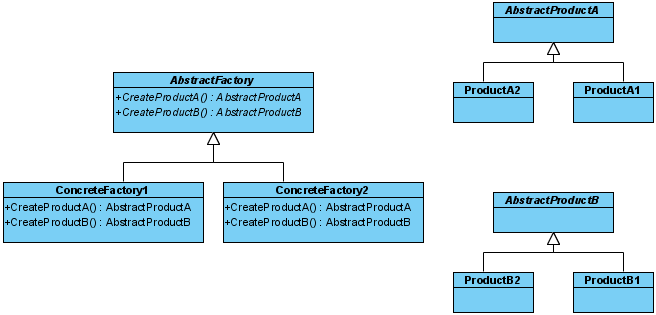
- Repeat step 13 on ConcreteFactory2. Up to now, the diagram should look like this:
- Link up the Factory and Product hierarchies by visualizing their dependencies. Right-click on AbstractFactory's operation CreateProductA and select Show Dependencies from the popup menu.
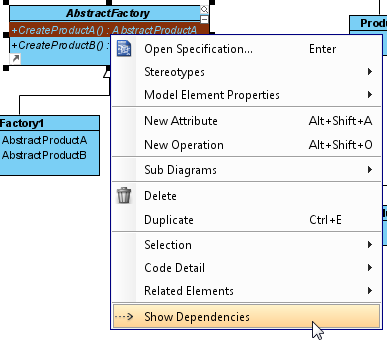
- Repeat step 15 on operation CreateProductB. Up to now, the diagram should look like this:
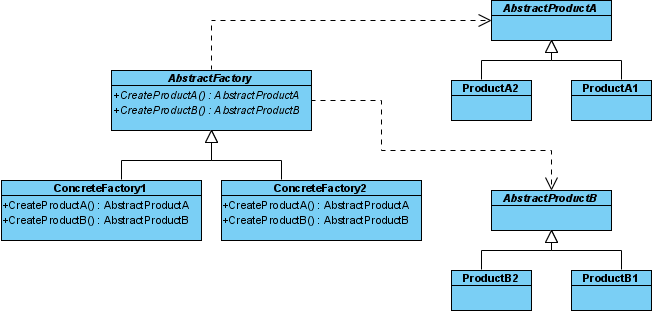
- Finally, create the Client class.

Defining Pattern
- Select all classes on the class diagram.
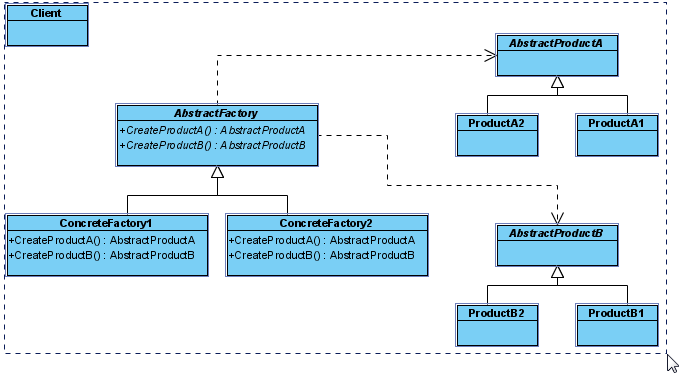
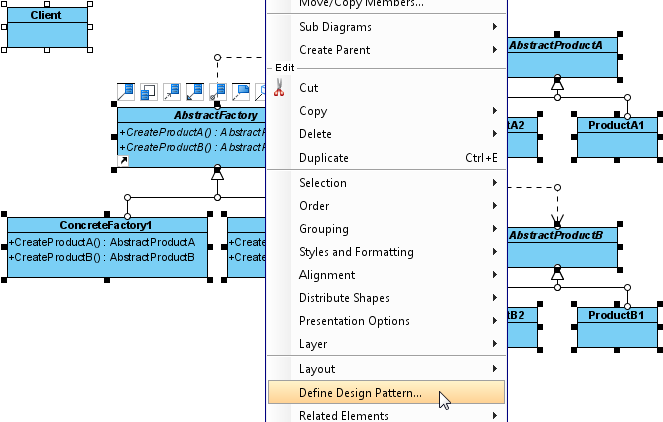
- Right-click on the selection and select Define Design Pattern... from the popup menu.
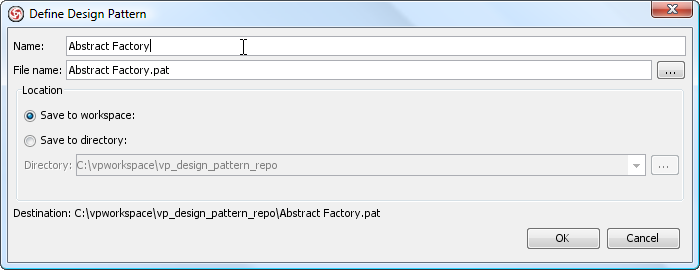
- In the Define Design Pattern dialog box, specify the pattern name Abstract Factory. Keep the file name as is. Click OK to proceed.
Applying Design Pattern on Class Diagram
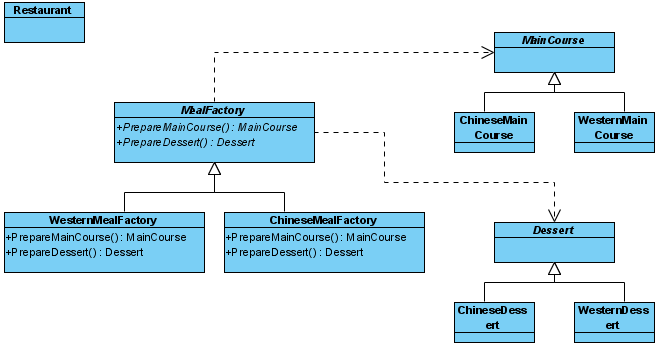
In this section, we are going to apply the abstract factory pattern in modeling a restaurant system which delivers both Chinese and Western meal sets.
- Create a new project Restaurant.
- Create a class diagram Meal Preparation.
- Right-click on the class diagram and select Utilities > Apply Design Pattern... from the popup menu.
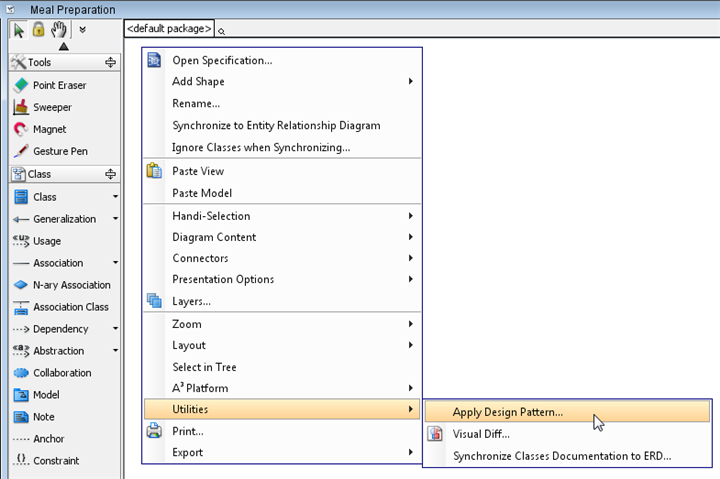
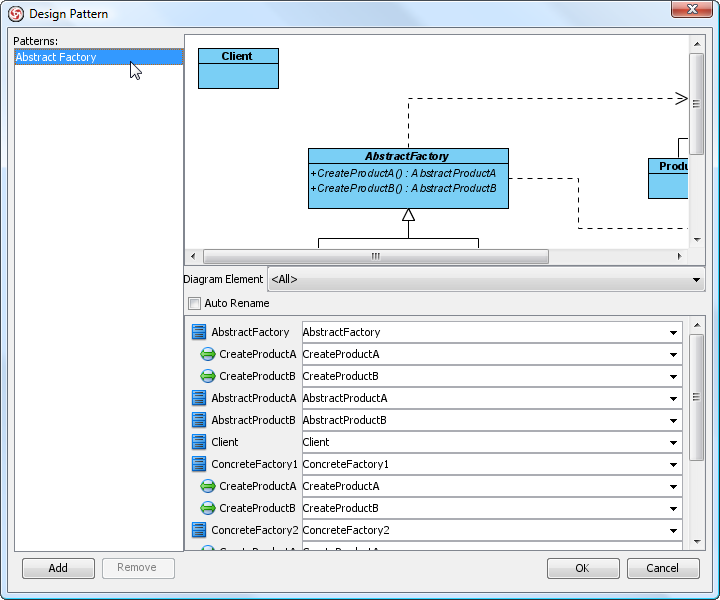
- In the Design Pattern dialog box, select Abstract Factory from the list of patterns.
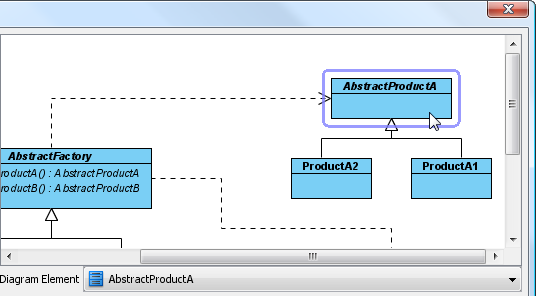
- Click on AbstractProductA in the preview.
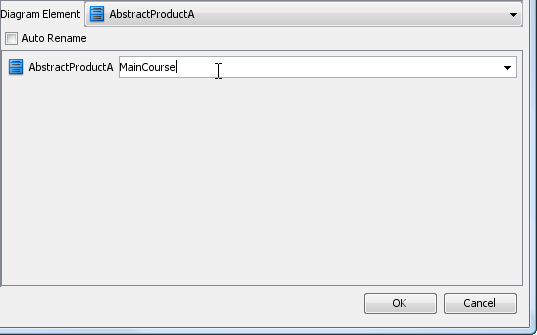
- Rename AbstractProductA to MainCourse at the bottom pane.
- Similarly rename ProductA1 to WesternMainCourse, and ProductA2 to ChineseMainCourse.
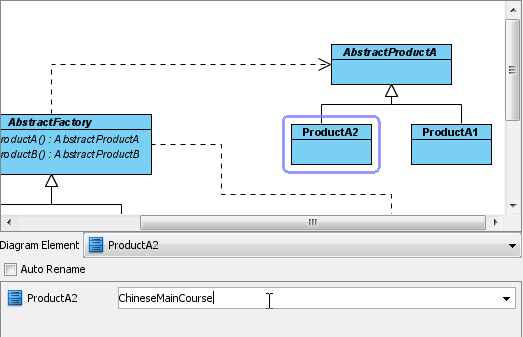
- Rename AbstractProductB, ProductB1 and ProductB2 to Dessert, WesternDessert and ChineseDessert respectively.
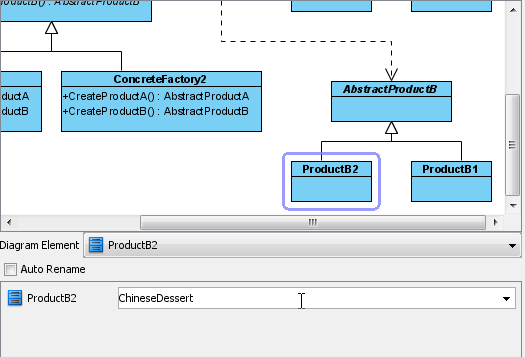
- Now comes the factory branch. Rename AbstractFactory to MealFactory first.
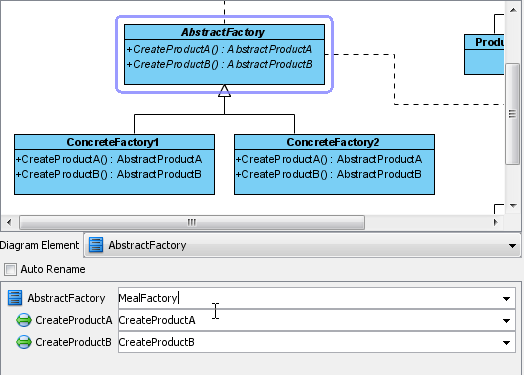
- Also rename the operations from CreateProductA and CreateProductB to PrepareMainCourse and Prepare Dessert.

- Similarly, rename ConcreteFactory1 to WesternMealFactory, and rename operations CreateProductA and CreateProductB to PrepareMainCourse and PrepareDessert accordingly.
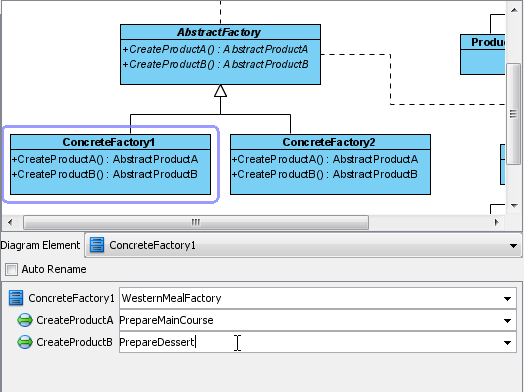
- Similarly, rename ConcreteFactory2 to ChineseMealFactory, and rename operations CreateProductA and CreateProductB to PrepareMainCourse and PrepareDessert accordingly.
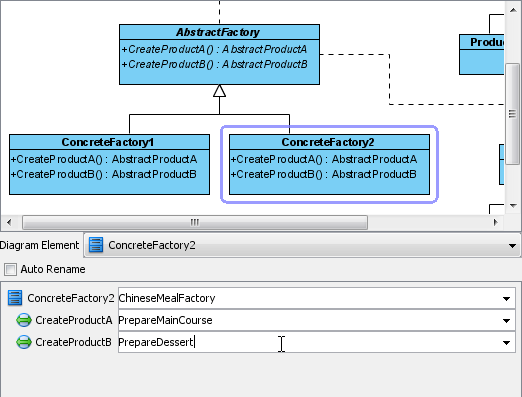
- Finally, rename Client to Restaurant.
- Click OK to confirm the changes, and apply the pattern. The following diagram is obtained.
